'new to us' dining room table: diy

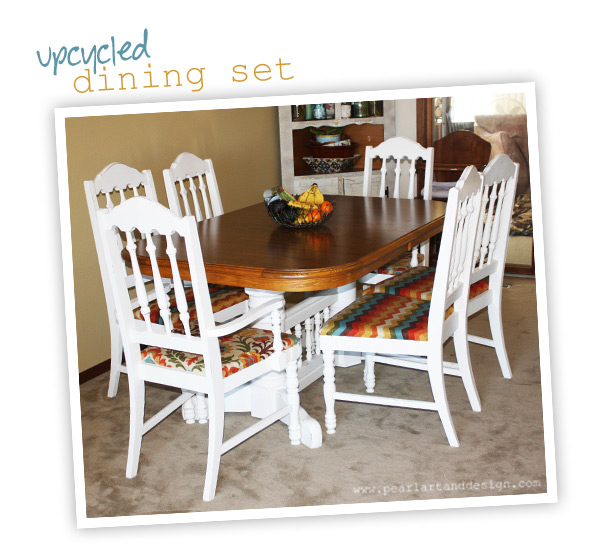
Our family is growing as should our dining room table right? We were very blessed with my husband's great-grandparents dining room table set and 4 chairs when we were married and it has treated us very well. Until I found a oak beauty for a steal and it became this beautiful set after many nights of painting, sanding, stapling and love.

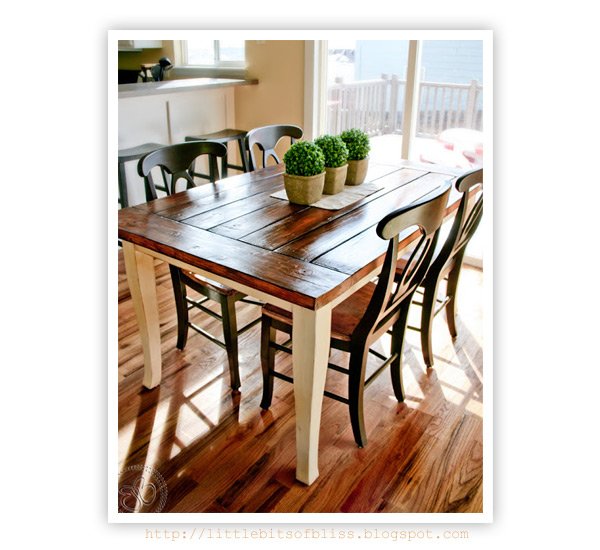
I have always admired farmhouse style tables, their ivory glory, colorful padded chairs, even benches. I have been dreaming about this exact table for a very long time. The Little Bits of Bliss blog hit this right on the spot.

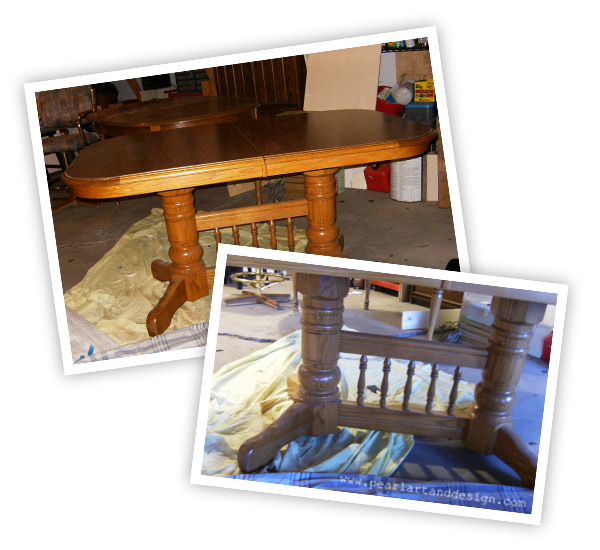
And I knew had to have it. With a little paint these days, really, anything is possible. This is what the table looked like before I started (I apologize for the crummy images, midnight hour painting with a baby is how things get done around here).

Now to backtrack. I first found a steal of a table with 6 chairs in the exact curvy legged farmhouse style I was looking for until I realized I neglected to ask the seller if the tabletop was real wood (with visions of just staining the top and refinishing the chairs). It was formica. So I ventured on to find another table and came across this huge heavy oak (with 2 12" leaves) on its way, literally, in a trailer, to an auction to be sold. They even came to my office with it and waited in town until I finished at work for them to deliver it to my garage. I love North Dakota. 

After priming it with an oil based primer, only the bottom, and giving it two coats of leftover paint from our bathroom remodel (images to come) this was the quickest part of the adventure. 

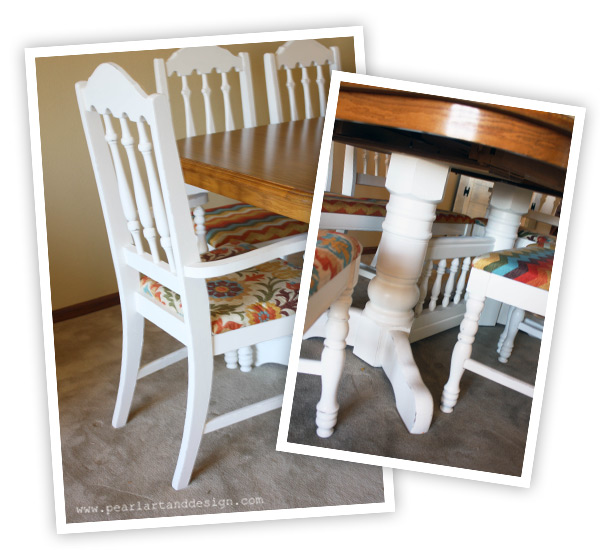
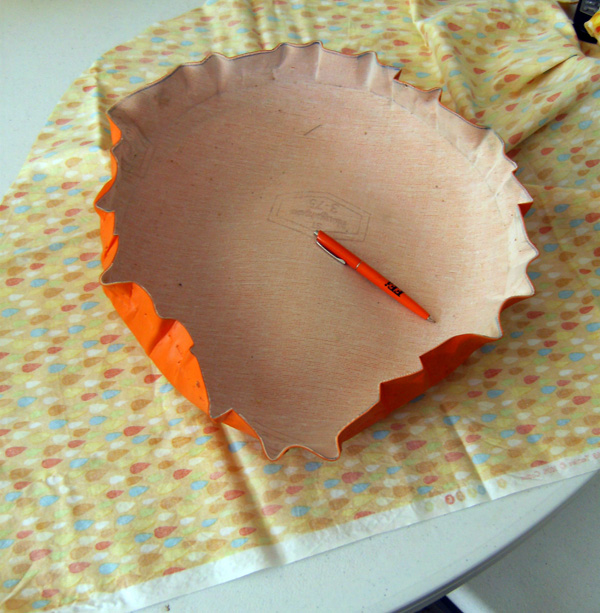
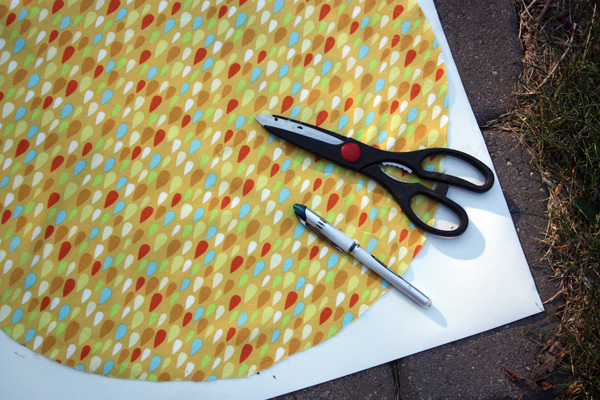
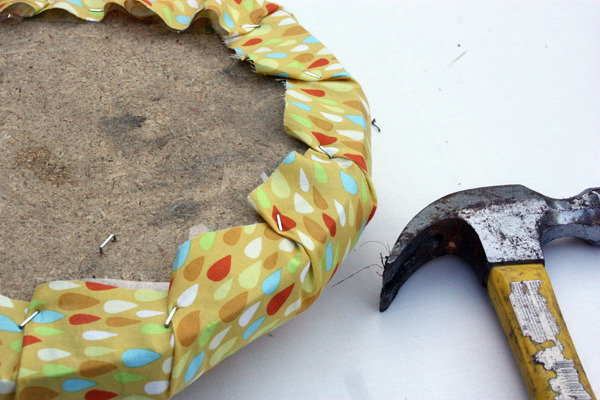
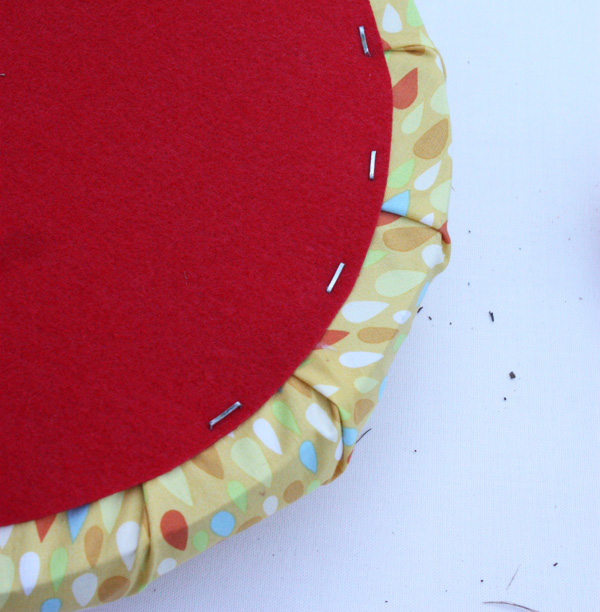
Aren't these chairs beautiful? I love how they turned out. I gave each chair a coat of oil based primer (I used this to save time on sanding and removing the varnish), and 2-3 coats of my leftover ivory bathroom paint they were ready for new covers. I must not have taken a picture of the chairs in their previous life, trust me, they were not magical. Our wonderful neighbor's father is retired and was a sweetheart by cutting me all new boards for them as I cut new foam and reupholstered them with wine and The Voice. 

I lighted sanded all of the chairs with a 60 grit sandpaper to rough them up as well as the bottom of the table. We recently had our daughter's 1st birthday party and I was so excited to be able to have our entire family around the table with room to spare.

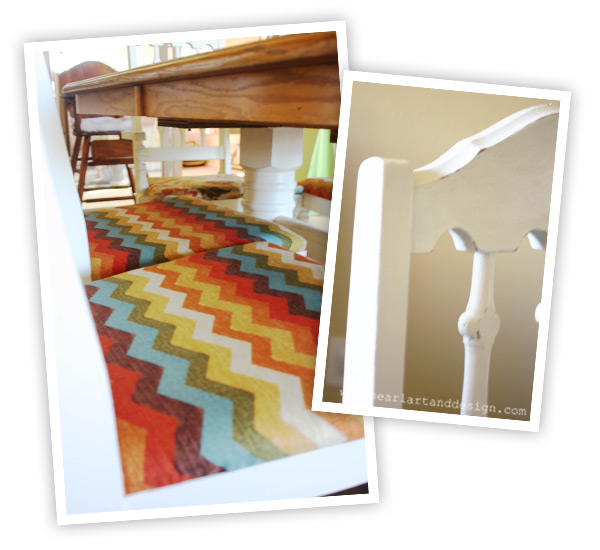
Here is a closer image of the chairs reupholstered. I chose a vibrant chevron pattern for the side chairs and a coordination floral for the captains chairs. 

What did I do with that extra table you ask? It joyfully still sits in our garage. It might be going to work as our creative inspiration station, if so, I need to start painting before the snow flies. 

And now that tonight I went to a Chalk Paint class at Eco Chic Boutique here in town I am super excited to get started painting an antique hoosier hutch we recently brought into the house as well as a few other projects. 


Upcycled Desk to Garden Hutch

If I were to say I were addicted to anything (other than sweets) it would be Craig's List. I am by no means ever looking for anything in particular but it's too amazing of a concept to pass up such great deals. Especially on great pieces.

This desk was a great $35 dollar purchase from a family that just didn't need this desk anymore. After bribing Adam to come with Brynn and I to pick it up, we had this beauty in the pickup and we headed home with glee. Maybe that was just me?

I just knew that this was going to be my mother-in-law's birthday present this past July (yes this is an old post). She has this beautiful, massive, amazing garden that she takes such great pride in. I also knew that she probably wouldn't want to get this dirty after it was finished so glady we scuffed it up on his way 90 miles west to the farm.

As for the process? Quick and easy. I quickly sanded it with my small electric sander, applied one coat of primer, and 3 coats of Sherwin-Williams outside stain. I went with this golden yellow to really pop off the brick red garden shed she has by her garden. Did I need to buy a gallon? NO. Have I tried to paint other things around the house this color to get rid of it? Not yet, but I sure did.

End of the story is that she absolutely loved it! It's October and I bet she still hasn't set anything on it for fear of getting it scuffed. The more I see it the more I think using a jigsaw to cut a circle in the top portion and inserting chicken wire below for her to fill smaller pots in, would be a great addition. As well as setting up a small wash stand next to it?

I hope this image brings back warm thoughts of summer, as we had our first snowfall in North Dakota today.

max the remake

foot stool, nursery, thrift store, diy

So this is Max. He previously presided at the local thrift store and found his way to my house :) Isn't he cute! I thought he would make the perfect foot stool for my rocking chair, with a little love of course. My future thoughts are that this would be a fun little step stool for the bathroom when bean is old enough to wash hands and brush teeth. We'll see how it holds up.

foot stool, nursery, thrift store, diy

First things first. Take Max apart and check out what he's got going on. Someone definitely took the time to make him by hand because you can tell by the line drawing on the foam seat cover and the carving of the face. After taking inventory of his parts I gave him a good sanding. His dark wood finish had sort of a sheen gloss to it and I want Max to last for years to come.

foot stool, nursery, thrift store, diy

Beautiful portrait of me I know. I must not have taken a picture of the actual priming step. This is more of a documenting nursery snapshot for bean to enjoy a hundred years down the road but it will do. I gave Max two light coats of white primer. It was a very muggy humid day so I let it dry a full day before taking on the next step. Max needed a breather anyway.

foot stool, nursery, thrift store, diy

Ready to paint! I gave Max two good coats for good measure. I am in love with this Ultra Cover spray paint. It looked great after just one easy quick coat but with two, I feel better about the durability of the tooth brushing stool days.

foot stool, nursery, thrift store, diy

Here he sits. I actually really didn't mind the unique orange leather/vinyl shell he was wearing but thought that for cleansliness purposes and for matching bean's nursery we would go with our fabric we have already purchased. Did I mention that Max was only $4.99?

After tracing Max's shell onto our new fabric I ironed it and set it aside.

foot stool, nursery, thrift store, diy

After checking out the foam piece that came with him I thought it through and decided I want another durable layer between the foam and the fun fabric. I found thin vinyl fabric at Joann's and traced and cut out the shell again.

foot stool, nursery, thrift store, diy

This next step was the fun part. It was too hard to take a picture while using the staple gun and holding down the two layers, sorry. My staples didn't go all the way in so a quick hammer jab on all of them and it turned out great.

foot stool, nursery, thrift store, diy

Once again, missed a photo. But as you can see I traced the same circle shape from the top onto a large scale piece of felt that I also found at Joann's. It was too large so I just trimmed an inch around the entire thing freehand. Stapled it on Max's shell and it was time to reassemble!

foot stool, nursery, thrift store, diy