Latest events

As of this afternoon, I have 35 design items listed in my shop and it is such a great accomplishment for my business. I have had this goal since last July when I decided to venture into turning my part-time freelance career into my full-time career. Phew, what a relief!

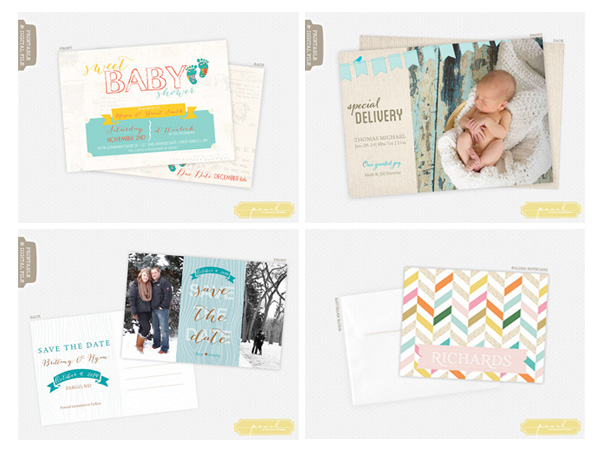
Here are just a few examples of items listed. There are now birth announcements, party invitations, personalized stationery and a few save the date designs. The fun part about starting this shop is the endless feeling of needing to create and design. It's not a terrible thing to wake up in the middle of night and start doodling right?

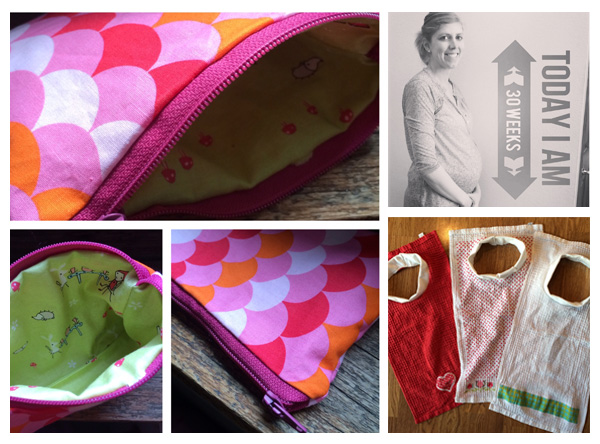
Other fun news happening around the office lately are a few fun sewing projects to welcome our new baby that will arrive in May, finally conquering my fear of sewing a zipper and repurposing some towels into new bibs for a very messy 2 year old oatmeal eater. The $1 section at Target is entirely too tempting.

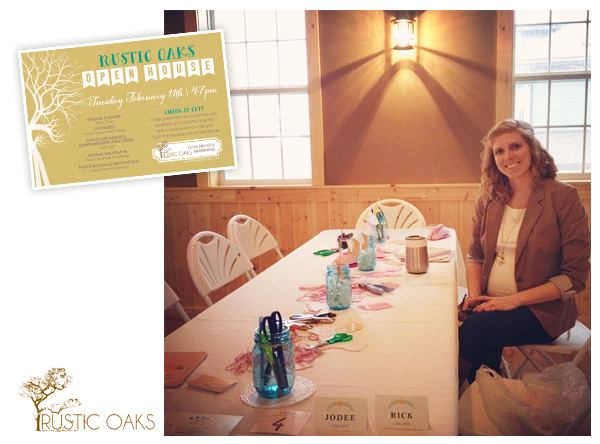
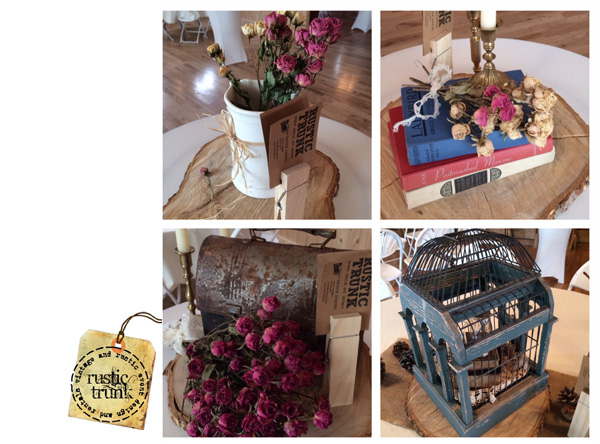
On Tuesday, February 11th I was able to help and be a part of the Rustic Oaks Winter Open House. The location/venue is absolutely beautiful, and every single time I drive out there I dream that I can relive my wedding and have it at Rustic Oaks. Carrie, with Rustic Trunk, decorated and styled the venue so superbly that it made my dream even more intense, ha. Here are a few photos from the event. If you are planning an event this summer and fall you must make sure to browse all of her inventory to make sure to nab some amazing pieces to style your own event.

I apologize for the poorly lit and grainy photo of me sitting in my space. Phone photos are not always stellar. In my space we created Valentine's bunting, super cute.

Along with keeping in touch with wedding clients and starting new projects I was able to work with the West Fargo Public Schools to product graphics for a recent Professional Development seminar. We created a logo, postcard, program and stickers for unique boxes for the staff to fill with ideas. I will post more on the fun event soon.

I also just sent two wedding collections to the printer this week for spring wedding's and it is so nice to see the final product come all together for the bride and groom's big day!

Have a very blessed week and keep thinking warm thougts!

'new to us' dining room table: diy

Our family is growing as should our dining room table right? We were very blessed with my husband's great-grandparents dining room table set and 4 chairs when we were married and it has treated us very well. Until I found a oak beauty for a steal and it became this beautiful set after many nights of painting, sanding, stapling and love.

I have always admired farmhouse style tables, their ivory glory, colorful padded chairs, even benches. I have been dreaming about this exact table for a very long time. The Little Bits of Bliss blog hit this right on the spot.

And I knew had to have it. With a little paint these days, really, anything is possible. This is what the table looked like before I started (I apologize for the crummy images, midnight hour painting with a baby is how things get done around here).

Now to backtrack. I first found a steal of a table with 6 chairs in the exact curvy legged farmhouse style I was looking for until I realized I neglected to ask the seller if the tabletop was real wood (with visions of just staining the top and refinishing the chairs). It was formica. So I ventured on to find another table and came across this huge heavy oak (with 2 12" leaves) on its way, literally, in a trailer, to an auction to be sold. They even came to my office with it and waited in town until I finished at work for them to deliver it to my garage. I love North Dakota. 

After priming it with an oil based primer, only the bottom, and giving it two coats of leftover paint from our bathroom remodel (images to come) this was the quickest part of the adventure. 

Aren't these chairs beautiful? I love how they turned out. I gave each chair a coat of oil based primer (I used this to save time on sanding and removing the varnish), and 2-3 coats of my leftover ivory bathroom paint they were ready for new covers. I must not have taken a picture of the chairs in their previous life, trust me, they were not magical. Our wonderful neighbor's father is retired and was a sweetheart by cutting me all new boards for them as I cut new foam and reupholstered them with wine and The Voice. 

I lighted sanded all of the chairs with a 60 grit sandpaper to rough them up as well as the bottom of the table. We recently had our daughter's 1st birthday party and I was so excited to be able to have our entire family around the table with room to spare.

Here is a closer image of the chairs reupholstered. I chose a vibrant chevron pattern for the side chairs and a coordination floral for the captains chairs. 

What did I do with that extra table you ask? It joyfully still sits in our garage. It might be going to work as our creative inspiration station, if so, I need to start painting before the snow flies. 

And now that tonight I went to a Chalk Paint class at Eco Chic Boutique here in town I am super excited to get started painting an antique hoosier hutch we recently brought into the house as well as a few other projects. 


Upcycled Desk to Garden Hutch

If I were to say I were addicted to anything (other than sweets) it would be Craig's List. I am by no means ever looking for anything in particular but it's too amazing of a concept to pass up such great deals. Especially on great pieces.

This desk was a great $35 dollar purchase from a family that just didn't need this desk anymore. After bribing Adam to come with Brynn and I to pick it up, we had this beauty in the pickup and we headed home with glee. Maybe that was just me?

I just knew that this was going to be my mother-in-law's birthday present this past July (yes this is an old post). She has this beautiful, massive, amazing garden that she takes such great pride in. I also knew that she probably wouldn't want to get this dirty after it was finished so glady we scuffed it up on his way 90 miles west to the farm.

As for the process? Quick and easy. I quickly sanded it with my small electric sander, applied one coat of primer, and 3 coats of Sherwin-Williams outside stain. I went with this golden yellow to really pop off the brick red garden shed she has by her garden. Did I need to buy a gallon? NO. Have I tried to paint other things around the house this color to get rid of it? Not yet, but I sure did.

End of the story is that she absolutely loved it! It's October and I bet she still hasn't set anything on it for fear of getting it scuffed. The more I see it the more I think using a jigsaw to cut a circle in the top portion and inserting chicken wire below for her to fill smaller pots in, would be a great addition. As well as setting up a small wash stand next to it?

I hope this image brings back warm thoughts of summer, as we had our first snowfall in North Dakota today.